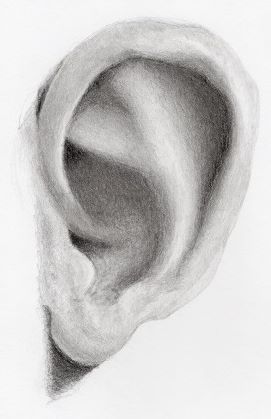
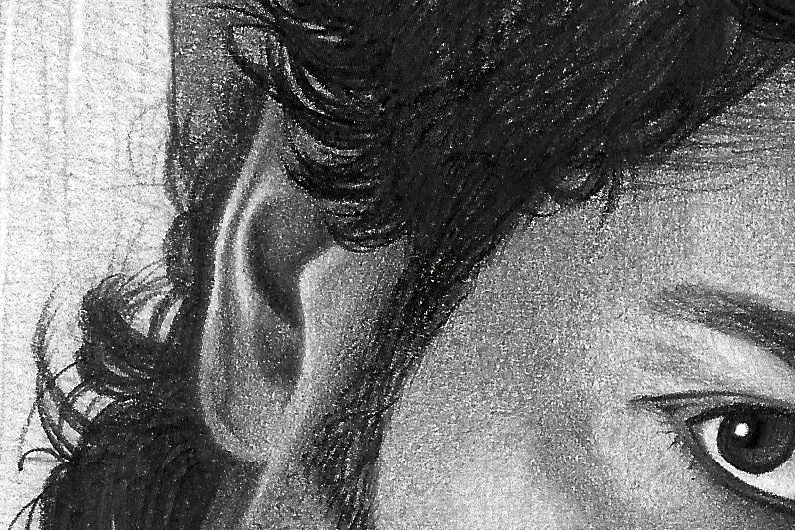
Ears don’t draw as much attention as the other parts of a face and are often totally hidden by hair. A closer look shows that they are very complicated – in fact perhaps more so than the rest of the face put together!
A small blending stick is useful for shading the small areas in the ear.
Creating an Outline
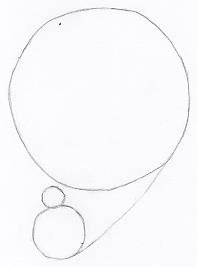
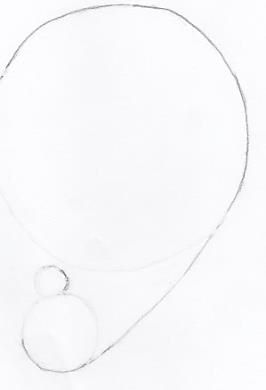
There is an easy way to draw the outline of a non-specific ear. First you draw a stylized Madonna and Child – no kidding.

This you do by roughing in two circles – a large one and a small one in a Madonna and Child – like pose.
On top of the head of the “child” you add a circle (about 1/8 the size of the head).
Make sure your outlines are VERY LIGHT, much lighter than the ones you see here. Use a 2B pencil which is easier to erase than the harder leads.
Your outline should look something like this:
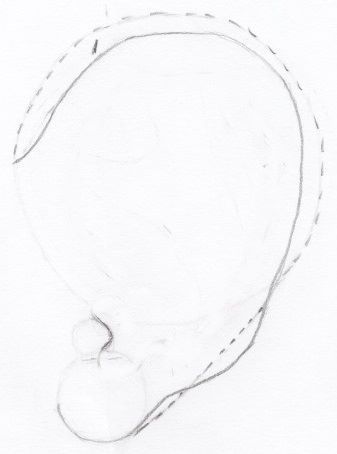
In the image below I have indicated some of these lines as dotted lines:
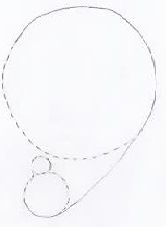
We won’t need these lines so we can erase them.
Your outlines should now look like this:
That wasn’t so difficult and the most difficult part is done.
Modify Slightly
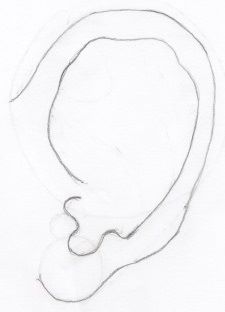
As normal ears aren’t usually quite so round, draw a new outline for your ear (1) within the guidelines you already have. Observe your reference to get the shape correct (or invent your own ear for this tutorial).
Remember draw very lightly – you need to erase it in a later stage.
Draw the Inner Part of the Helix
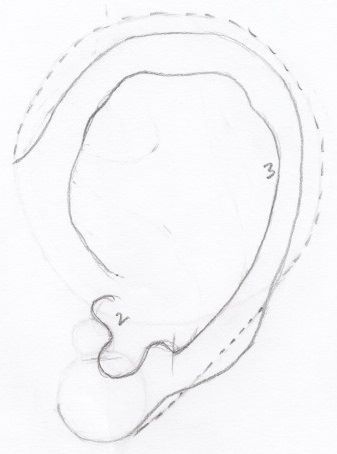
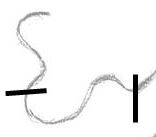
When this new outline is complete draw the helix inside your newly-drawn outline guidelines (3). At the bottom of the helix there are two s-curves joined together. (2)
Here I have separated the S-curves so you can picture them better:
Rub out all the guide lines you don’t need anymore and your drawing should look something like this:
Buy a cheap cotton glove and cut off the fingers on your drawing hand glove about half way down. This way you can reduce smudging without losing “feel”.
Draw the Inner Part of the Helix
This is the second element of your drawing “crutch” which will help you to draw an ear. Draw a “melting Y” as shown in the image below. Remember that I have drawn mine dark so you can see. You must draw yours as lightly as possible so that it doesn’t show through on the final drawing.
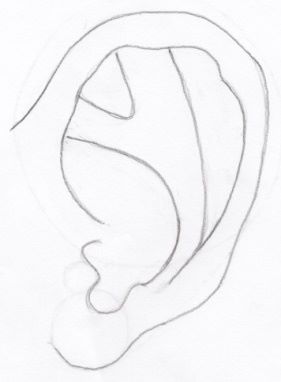
Make sure to erase / not draw in the base of the melting y:
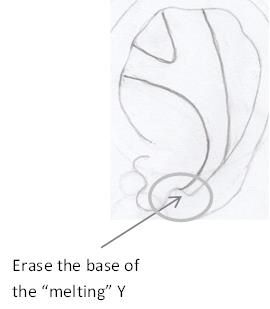
Your outline is done!
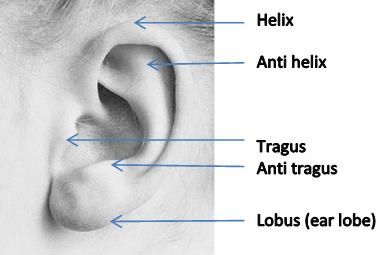
Remember every ear is different but knowing how the elements are put together will allow you to recognise them and know how to draw them.
Here’s what you have drawn:
Shading the Ear
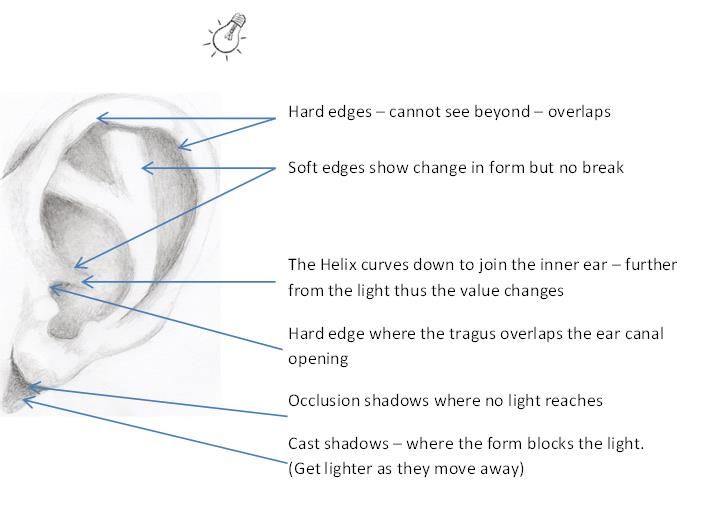
In order to draw the ear effectively we need to know a few things about shading and how light affects the objects we are looking at. When it comes to drawing the ear we are working with cylindrical forms. With cylindrical forms it is very important that we observe and draw the shadows correctly so let’s look at the different shadow types:

Form or core shadows:
The shape of the object itself causes parts of it to curve away from the source of light and thus become darker.
Cast shadows:
This is the shadow the object casts on the surrounding surface as it blocks the light. Cast shadows are found inside the ear as well as on the head where the ear is close enough to cast a shadow. Cast shadows get lighter the further they stretch from the ear.
Occlusion shadows:
Are very dark shadows where no light reaches. Usually found where the object touches the surface on which it rests or in deep recesses. (A good place to use your 4B or even 8B pencil).
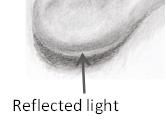
Reflected light:
Reflected light is the light that bounces onto the object from the environment and is essential to show the rounded form. Important to remember is that the reflected light forms part of the shadows and not part of the light. It should be shown by darkening the surroundings and not by erasing graphite.
Why? Because the lightest shadow must always be darker than the darkest light. Read that again slowly to make sure it sinks in because it is very important to understand : The lightest shadow (reflected light) must always be darker than the darkest light.
Because reflected light is bounced back onto the object from the surroundings, it cannot be lighter than light falling directly on the object.
Here is an example of reflected light visible on the ear:
Shadow edges:
Pay attention to the edges of the shadows. They will either be hard (sharp edge) or some degree of soft (fade out to a more or lesser degree).
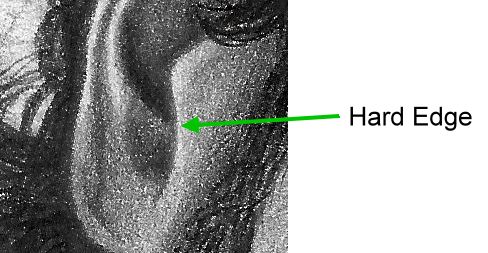
A hard edge means that is the limit of what you can see of the form. When one surface overlaps another you cannot see what’s underneath the overlap so there is a break in your view. This will be a hard edge.
Here you can see an example of a hard edge:
A soft edge shows there is a change in shape, (a rounding), of the form but no overlap i.e. there is no break in the form and the entire shape can be seen. This will be a soft edge.
Here you can see an example of a soft edge:

Before you start drawing carefully observe your subject to determine where the light is coming from as it affects where the highlights and shadows will go.
It’s best to use a sticky note with an arrow drawn on it and stick it onto your drawing paper as a constant reminder of light direction. This will help you determine how the shadows fall and that in turn will enable you to shade your outline to make it look realistic.
Adopt a Zen Approach
If you are using a reference, turn it upside down so you see the different tonal values as shapes instead of parts of an ear. By doing this, your brain’s “default” setting for ears doesn’t influence you to draw what you think you see instead of what’s really there.
Mapping the shadows won’t be difficult if you bear this Golden Rule in mind : “The further from the light an object is, the darker it gets”.
Create a “graphite farm” by rubbing a 2B pencil over a small piece of cardboard until it’s thoroughly covered with graphite. If you then rub the pointed end of a blending stick lightly over this “farm”, it will pick up enough graphite to use it like a pencil to draw the outlines of your drawing. This way you don’t have to worry about hard lines you can’t get rid of later.
The value (degree of lightness or darkness) of the different shadows in the ear can only be judged in comparison to each other i.e. they are relative. You will need to adjust the values as the drawing progresses to achieve the proper final balance. It’s therefore better to start out light, (harder pencil grade used lightly) and increase the darkness by adding softer pencil grades over the top), than to go in too dark right away and not have a way of increasing the value of an area later should you need to. A 2H or H grade pencil is a good pencil to start with.
Shading the Helix
The helix looks pretty straight forward, but don’t be fooled. If you look closely you will see how the shadow changes as the helix moves closer and further from the light. The side closest to the head dips down steeply to where it fuses with the base of the ear, next to the opening to the ear canal. In doing so it moves away from the light and becomes darker.
Shading the Helix
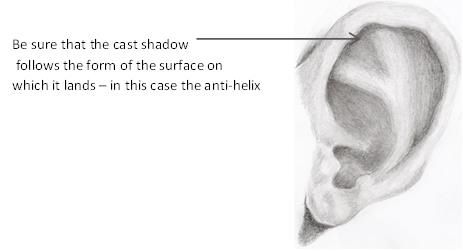
The Anti-Helix disappears under the rim of the helix at the top of the ear which means it is partly in shadow. The anti-helix is curved – follow its curve with your shading.
Shading the Tragus & Anti-Tragus
Both overlap the ear canal opening resulting in a hard-edged shadow. They are both slightly raised and catch the light.
Shading the Ear Lobe
The ear lobe is not flat but has different planes with different values. Look carefully at your reference to spot and draw these humps and bumps correctly.
Darkening the Shadows
Now that you have an indication of where the shadows are, you can start to darken them up using a HB, 2B and 4B pencil.
Not all the shadows should have the same value, (shade of grey), or your drawing will look flat. Compare one shadow with the next and with your reference to decide how dark, (what value), each should be.
Reserve your darkest pencil for the darkest shadows.
When you have adjusted your shadows relative to each other and the light source, your drawing should look something like this:
Introducing the Mid Tones
Mid tones join the highlights and the shadows. Another name for mid tones is “body colour or local colour” because mid tone is the colour of the object without shadows and highlights.
Good grades of pencil to use for mid tones are H, HB and B. The mid tones won’t be all one value as there will be lighter and darker areas within the mid tone range but they will be lighter than the lightest shadows and darker than the highlights.
Study your reference to locate these small differences in value. Mid tones can be created by gently blending from the dark areas towards the light. If needed, increasing the value by adding more graphite.
When the mid tones are done, you will find that you need to adjust the shadows as they will not now not appear dark enough anymore.
Adding Highlights
Highlights, (the brightest areas), are usually put in last. An easy way is to gently erase the highlights with a putty eraser or an ordinary eraser cut at an angle to give you a sharp edge.
Erase a bit lighter than you need, then blend over the edges so as to remove any hard edges and integrate them into the rest of the drawing. Remember it will only be possible to get back to the white paper if you have used a light touch in blending your mid tones and shadows.
If you are having trouble with graphite refusing to stick when creating your darks, spray your drawing with fixative. This creates a slight roughness or “tooth” which will accept more graphite.
Because skin is not highly reflective, the highlights will be soft edged. Even in the highlight areas there should be small variations in value.
Adding Highlights
When you have finished adjusting the shadows, mid tones and highlights, your drawing should look something like this:
To make your drawing really pop – increase the contrast by darkening the darks and cleaning up edges.
Use an “extra black”, charcoal or carbon pencil to achieve extreme contrast in small areas and create more depth in your drawing.
Remember there are as many different types of ears as there are people so there is no right or wrong.
All you need to be sure of is that you know why you placed your values where you did and that you have slavishly followed the golden rule “the further from the light source an object is, the darker it gets”.
This is what my completed ear drawing looks like (can you still picture the Madonna and Child?):
