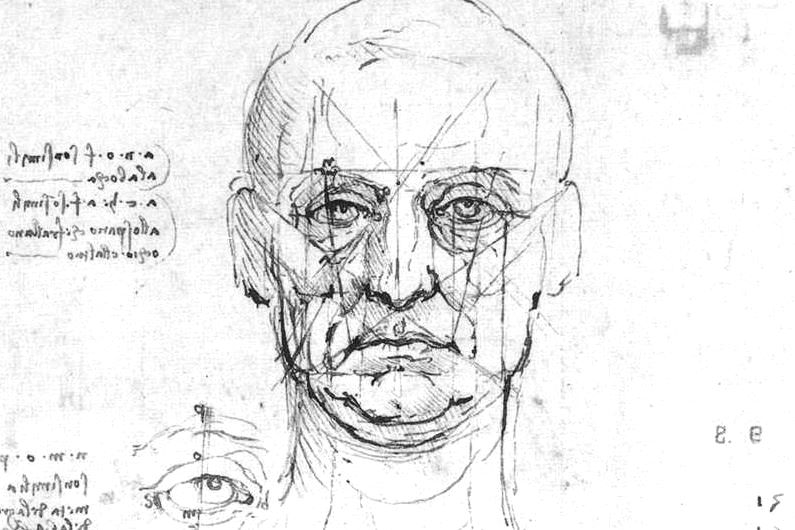

Plotting the Facial Features
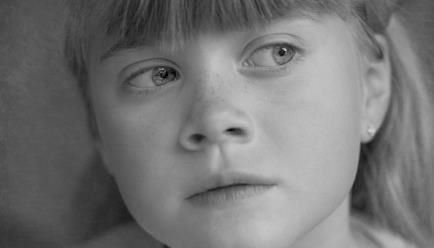
Getting your head around drawing a “generic” head and how and where to place the facial features means you can draw a realistic human face freehand. And, if you are attempting to draw a particular face from a reference, knowing the “norm” will help you to see how their face shape and/or features differ from the norm and enable you to capture a better likeness.
One time-tested way of simplifying drawing a human head is called the Loomis method and is the one loosely followed in this tutorial. Note it applies to a front-on view of the head only - not when it is tilted upwards, downwards or sideways. (That is the subject of another tutorial).
Step one couldn’t be more simple. Draw a circle to represent your head-to-be. Don’t worry if you have to go over your drawing several times to get it close to round – these guidelines will all be erased later. Be sure you use a soft (HB or 2B pencil with very little pressure).
Draw a vertical line to divide your circle in half. Now divide your circle in half horizontally with yet another line.
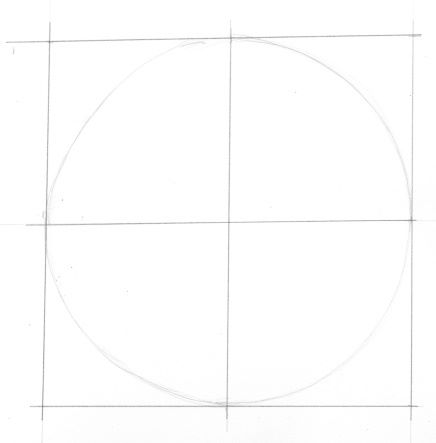
It's easier to draw a circle inside a square you have divided into quarters.
(All these guidelines must of course be drawn very lightly as they will be erased later.)
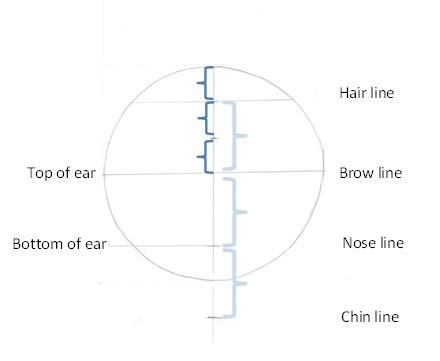
Brow Line
The horizontal line you just drew is the brow line of your soon-to-be-completed imagined face. As the top of the ears are level with the brow line you have also located the top of the ears.
Hair Line
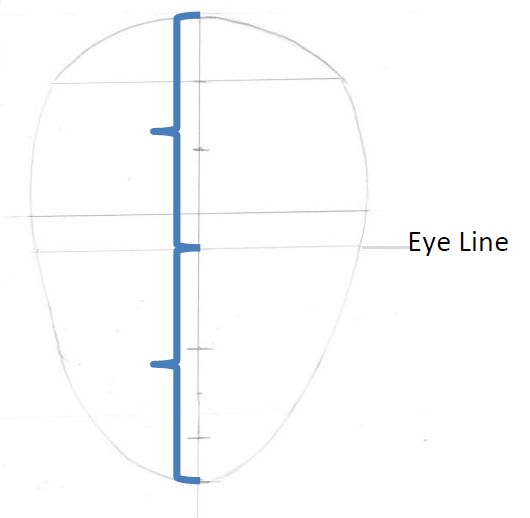
Divide the portion above the brow line you drew into three equal parts. At the second division up from the brow line, draw a line horizontally to represent the hair line.
The Ears
Measure the distance from the brow line to the hairline on your drawing. Using this distance, measure from the brow line down and make a mark on the vertical midline at this point. This will show you where to place the bottom of the nose. It also marks the bottom of the ears.
The Chin
Using the same measurement as you did to draw the nose line, draw the chin line below the nose line.
Decide the width you want the chin to be. How wide you make the chin depends on whether you are drawing a male or a female, and on individual differences.
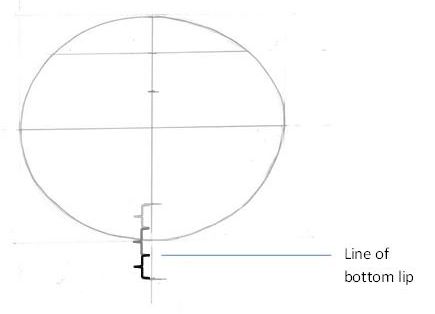
The Mouth
To pinpoint where to place the mouth, divide the distance between the bottom of the nose and the chin into three equal parts and draw the mouth line on the second of the three divisions from the nose down. This will be where you place the bottom of the bottom lip (in men). If you put the centreline of the mouth on this line it can result in the chin being too short. In women it is best to put the midline of the lip on this line or the chin looks too long.
The Shape of the Head
Because most humans don’t have totally round heads, carve off the sides of your circle. How much you remove depends on how wide you decide to make the face you are creating.

The human head comes in a wide variety of shapes.

The Jawline
To draw the jaw, start at the point where the brow line intersects your newly-narrowed head, extend the line downwards until you meet up with the edge of the chin line. Usually the jaw line tapers towards the chin but not always as some people, men especially, have very square jaws. Your head outline should now be roughly oval in shape.
The Eye Line
The eye line is found by dividing the entire length of the head in half.
Now stand back, take a look, and congratulate yourself.
What you have done is to not only draw an outline of your head-to-be using the rule of thirds, but you have also located all the features.

Drawing the Neck
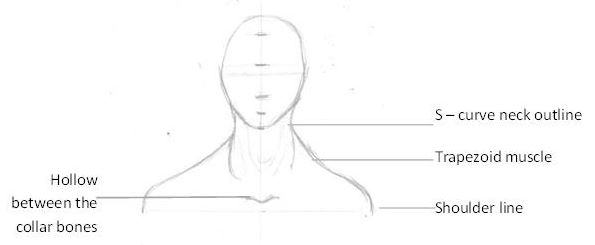
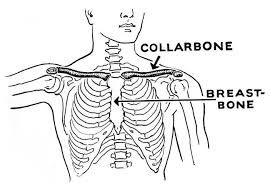
Step one is to determine where the shoulder line is and how wide you want to make it. It’s on this line that the collar bones (clavicles) will lie.
Then draw in the trapezoids.
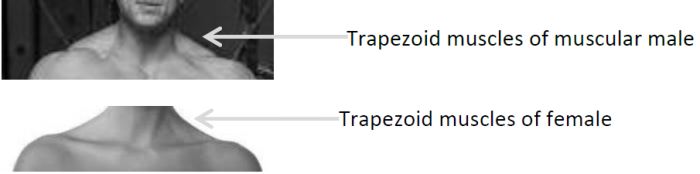
These are the muscles which give the characteristic outline to the shoulders. In women the trapezoids are fairly flat (think a wire coat hanger shape). In men they are usually more sloping and, in muscular men, the top surface of the trapezoids may even bulge outwards.
The trapezoids start at the outer edges of the shoulder line and end equidistant from the midline of the head and shoulders. At this point there is a hollow caused by the protruding collar bones and breast bones underneath the skin.
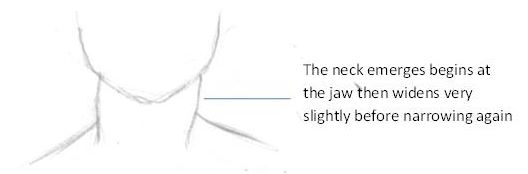
Now for the neck. Usually the neck begins inside the jaw line, i.e. after the jaw starts sloping inwards to meet the chin. If you are drawing a body builder or a person who is very fat, the neck may much wider.
Decide on the width for the neck you are drawing, (or, observe your reference). Drop a very slightly S-shaped line downwards for the neck until below level of the trapezoids.
There are two prominent tendons under the skin of the neck. They connect from the base of the skull and converge to meet at the hollow which lies between the ends of the two collar bones. As these tendons descend from the skull they get wider and move closer together. In women they will be less prominent. Be careful when drawing the tendons as adding too much emphasis will age the neck.
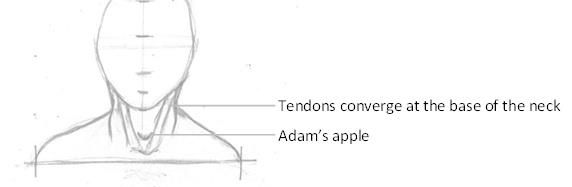

In men, the Adam’s apple is situated just above where these tendons meet. Women don’t have a visible Adam’s apple.
Putting It All Together
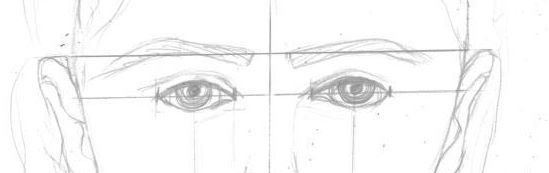
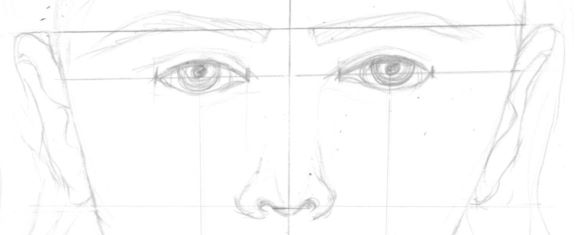
The Eyes
Locate the eye line you drew.
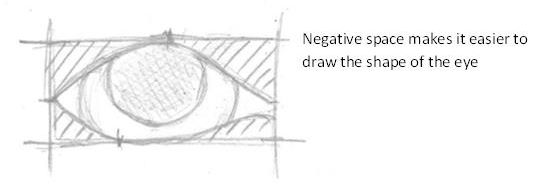
The easiest way to start drawing the eyes is by drawing two rectangular boxes the width and height you want the boxes to be. By using negative space inside the box it is easy to get the shape and size of the eye correct.
To estimate the width of the eyes, divide the width of the head (excluding the hair or ears), into 5 equal parts.
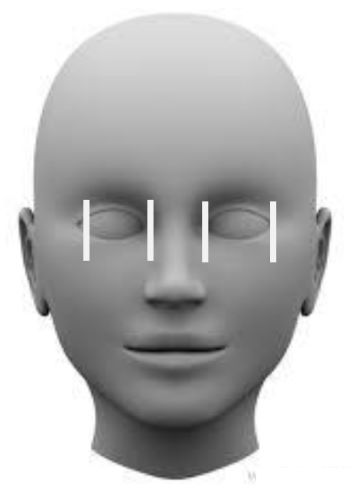
One part-width is the width of the (average) eye.
The eyes are spaced one part-width apart; (unless you’re drawing someone with close-set or wide-set eyes in which case the eyes will be less or more than one eye-width apart respectively).
The space between the outer corner of the eye and the edge of the face on both sides of the face is one part -width as well.
(How convenient is that?)
For details on how to draw realistic-looking eyes refer to the tutorial How to Draw the Eye.
Eyebrows
Eyebrows are, of course placed on the brow-line. The inner and outer corners of the brow may be slightly below the brow line and the arch of the brow slightly above depending on the shape of the brows and their bushiness.
Subtle differences in brow height will also depend on the expression of the face you’re drawing. See the above mentioned tutorial, How to Draw the Eye, to perfect the eyebrows on your face.
The Nose
The nose is obviously drawn in the centre of the face. You have already marked where the bottom of the fleshy part of the nose, (the bulb), goes. The wings of the nose, (the fleshy bits surrounding the nostrils), can fall above or below the bottom edge of the ball depending on the shape of nose you’re drawing. (Some people have a turned-up nose in which case the bottom of the bulb will be above the wings. Others have an aquiline (long) nose where the bulb is below the wings (when seen from the front of course).
The nose is the same width as an eye and can be found by dropping a line straight down from inside of the eyes (when looking straight ahead). For more information on how to draw a fabulous nose see a previous tutorial How to Draw a Nose.
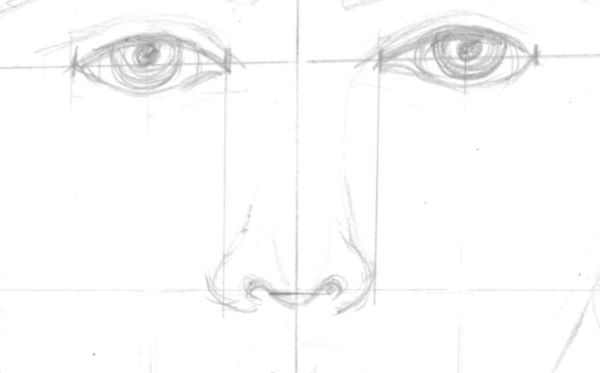
If drawing a particular nose be aware that these directions are for the “average” human head. Noses, like all the other features, have endless variations on a theme. Knowing the average length and width however will enable you to see where the particular nose you are drawing differs and enable you to draw a realistic likeness.
The Mouth
The mouth is (obviously) placed on the midline of the face and the middle of the mouth is the midline that separates the upper and lower lip. The midline of the mouth is placed on the lip line in woman. Often in men it’s better to put the bottom of the lower lip on the lip line – not the midline of the mouth. This ensures that the chin is not too short.
How wide the lips are varies greatly but in Mr or Mrs average you can find the corners of the mouth by dropping a line down from the centre of each pupil; (assuming the eyes are looking straight ahead of course). See how to shade the mouth by reading the tutorials on How to Draw the Mouth and How to Draw the Lips and Teeth.
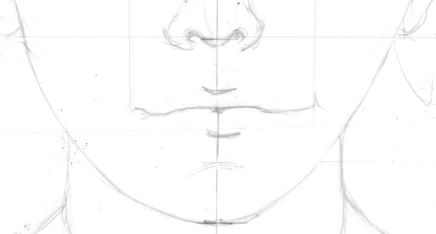
The Ears
The ears join the face at the eye line and the top of the ears touch the brow line. The bottom of the ear is usually level with the bottom of the nose. For help in drawing a realistic ear, see the tutorial on How to Draw Ears.
The Hair
Lastly sketch in the position of the hair. Do not draw in individual hair at this stage. All you are interested in is the general shape and position of the hair.
Your face drawing should look something like this at this stage:
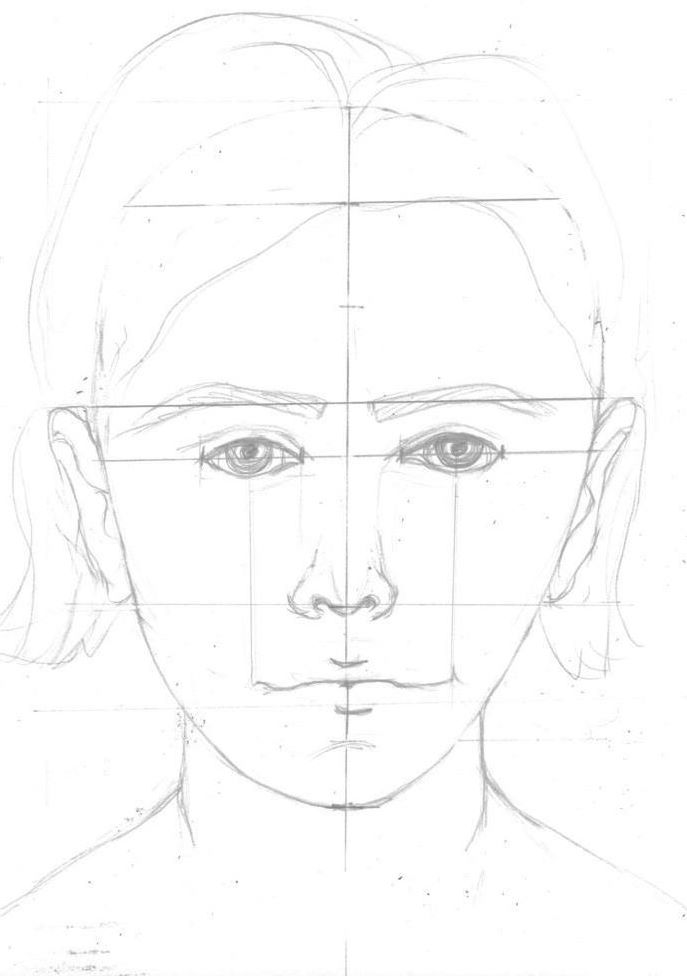
Once you are finished placing all the features in the face you drew, rub out all your guidelines. You are now ready to draw each feature in detail (add shading to the sketch).
Gender Differences in Drawing Heads
There are gender differences which usually, (but not always), apply when drawing a human face. Here of some of them that you can look out for:
- Females usually have slightly bigger eyes which are wider and more open.
- Eyebrows are often more bushy in males and closer to the eyes.
- The foreheads of females are usually narrower and lower than in males.
- Female chins are less angular and more pointed.
- Males have bigger chins which tend to be more square in outline.
- Female chins are usually shorter than in their male counterparts. Often when drawing female faces, it is necessary to shorten the chin slightly to make it look more realistic. Remember the marks you make are only guidelines, and are there to be manipulated to suit the face you are drawing.
- Female lips are usually fuller and the upper lip has more definition.
- Noses are usually smaller in females.The necks of males are usually wider and shorter.
- Females have less prominent Adam’s apples and thinner necks generally.
- The collar bones in females are less pronounced.
- Women’s shoulders are less sloped with no muscle bulges showing. They are usually narrower as well.
- The tendons in a woman’s neck are less prominent.